Posted on

A Guide to Microbiological Air Sampling

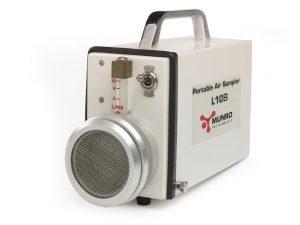
An air sampler comprises an inlet that directs air into the collector, a filter that removes bigger particles that could interfere with the analysis.

It is necessary to monitor medical and pharmaceutical plants with microbiological air monitoring.  It is considered a necessity in the majority of nations.  However, airborne germs and fungus may be just as dangerous in healthcare, food processing plants, office towers and other workplaces.  Large amounts of fungal spores in the air may have a detrimental influence on the shelf life of baked products.  It has its requirements in various other fields too.

methods for monitoring:

With the help of microbial air measurement, it is possible to determine the percentage of hyphae fragments and germinable spores present in the air.  Microbiological air aggregation devices that function in impaction are used to collect the samples.  Using a suction device, the microbiological air aggregation device draws in a specific volume of air. It then secretes the airborne spore via a sieve onto the underlying growth media in an agar plate.  It is recommended that the afflicted room not be ventilated for approximately 12 hours before the microbiological air assessment and that no dust is raised.

The two primary methods for monitoring are:

  1. Active sampling
  2. Passive monitoring


A Guide to Microbiological Air Sampling

Active Sampling of the Air

Active air sampling entails physically drawing a known air volume over a device of particle collection using a microbiological air sampler.  There are two primary varieties: impingers and impactors


Impingers

These capture particles using a liquid medium.  Usually, a sampled air is pulled into a tiny flask that contains collection medium via a suction pump with the help of a tube of narrow inflow.  This pushes the air toward the collection medium’s surface.  The rate of flow is governed by the entrance tube’s diameter.  The air quickly changes direction, impinging any suspended material into collection liquid whenever the airstrikes the liquid’s surface.  The collecting liquid could be cultivated to determine the presence of live bacteria after sampling.  The result is quantifiable, as the sample size can be determined with sampling and the flow rate.

Impingers have drawbacks for routine airborne microbiological testing.  Typically, traditional designs are built of glass, which is unsuitable for food and pharmaceutical manufacturing facilities.  Cells of some microbial organisms could be damaged as well as prolonged sample times may allow certain cells to grow inside the liquid collection media, which shouldn’t happen.

 Impactors

For gathering of particles, solid or adhesive media are used by impactors samplers. Owing to their convenience, they are also far more frequently employed in commercial uses than impingers.  Additionally, they are capable of handling greater flow rates and huge sample volumes required for monitoring air quality of clean rooms where microbes are anticipated to be negligible.  However, caution must be taken not to leave agar plates in the sampler heads for an extended period of time since the medium can dry out or even degrade.

A pump/fan draws air into the sampling head of a standard impactor sampler and accelerates it, typically by a sieve sampler, perforated plate or a slit sampler, narrow slit.  This results in laminar airflow onto the surface of collection, which is frequently a normal agar or contact plate loaded with an appropriate agar medium.  The size of the pores in sieve samplers, as well as the width of a slit in slit samplers, are used to calculate the air velocity.  When air collides with the collecting surface, it undergoes a change in direction that is tangential.  Inertia ejects any suspended particle colliding with the collection surface.  Once the proper air volume has been supplied through the sample device, the agar plate is okay to be withdrawn and immediately incubated.  Counting visible colonies after incubation provides a direct quantitative indication of the number of units that are colony-forming in the sampling air.


2.  Passive Monitoring:

Conventional Petri dishes with appropriate cultural medium that is unsealed and subjected for a specified period of time before being incubated for permitting visible colonies to grow and be counted.  Settle plates have a very restricted applicability as they’re only able to monitor living biological particles that settle outside the air then settle onto a surface with time.  They are also susceptible to contamination through sources that are non-airborne. They are unable to detect finer particles in air, and they are unable to sample exact amounts of air. Therefore, no quantitative results are found.  Settle plates are prone to be overrun in highly contaminated environments, and it can be challenging to interpret the data they generate.  If exposed for an extended period of time, the plates of the agar growth medium may degrade.  For the pros, they are advantageous for a qualitative investigation of airborne microorganisms and are affordable as well as simple to use.
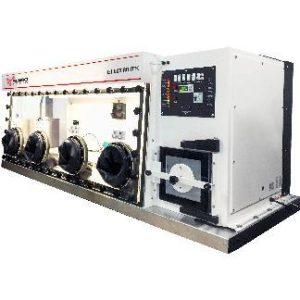
 

MUNRO Air Samplers

They have a broad range of applications and are used widely in the nuclear, construction, agricultural and manufacturing industries.Air samples are taken to measure the concentration of harmful airborne contaminants. This is for health-and-safety purposes and to monitor compliance with industry regulations.

Posted on

Anaerobic Chamber’s Microbiological Significance

Anaerobic chambers are often called anaerobic glove boxes. These chambers are atmospheric control units for use while working with materials sensitive to oxygen or performing general isolation, etc. These machines simplify researchers to prepare, cultivate, and analyze samples without exposing them to ambient oxygen.

Anaerobic chambers have recently gained much importance in laboratories, especially for anaerobic processes and studies. Due to these anaerobic processes, there have been opportunities for new microbes to develop metabolically and physiologically using tools such as genomics, molecular, and proteomic tools. This has also widened the fields of applications of anaerobic chambers.

History of Anaerobic chambers

The invention of anaerobic chambers was done by Rolf Freter. He had been conducting studies on the anaerobic specimens that lived in the intestine of mouses. He took assistance from Dick Coy, an engineer in Michigan, to develop something through which he would have access to organisms. Because of this, he would have a supply of anaerobic organisms that is constant.

The anaerobic chamber that Dick Coy came up with was known to be the Coy Anaerobic Chamber. With time, as per the requirements of research, there were a lot of advancements in the technology of the anaerobic chambers. Among the very first used chambers were the vinyl chamber. Even after a long time, it is still the most extensively used. Later on, rigid chambers were designed for specialised purposes. Usually, the anaerobic environment with a concentration of 0–5 parts per million of oxygen is sustained using a mixture of hydrogen gas that reacts with a palladium catalyst, which eliminates the oxygen that is extra.

Anaerobic chamber applications:

Few of these applications include the usage of anaerobic chambers in clinical labs where for the patient specimens, the disease agents can be detected. We can also find if these diseases can be treated with the help of antibiotics through these chambers. These chambers can also help in the identification of the disease and studies on various topics such as the discovery of drugs, biofuels, bioremediation, biomass, etc.

Anaerobic Chamber’s Microbiological Significance:

Culture of microorganisms under anaerobic circumstances:

Anaerobic bacteria that are strict are extremely difficult to cultivate; they require specialised techniques right from collection to cultivation. Blood cultures often are collected and transported in separate vials: one including oxygen and one excluding. After that, they are cultured in the anaerobic chamber for research or phenotypic investigations. Incubation, which is a lengthy process, occurs in mediums of blood agar in an incubator at a temperature of around 37°C. Due to the chamber’s architecture, a direct investigation is permitted. Additionally, according to its size and qualities, the chamber can accept many samples. For instance, it can be used to create an environment that is suitable for tissues, microaerophilic organisms, or cells that are hypoxic. The anaerobic chamber is provided with sleeves to facilitate handling without interfering with anaerobic conditions.

Posted on

All you need to know about Anaerobic Chambers

Substances like metalloproteins are said to be oxygen sensitive. The reason behind this is that it is for the maintenance of a reduced state of the substance, an environment that does not have the presence of oxygen is needed. Substances like these could easily react with the oxygen in the environment as they are sensitive to it.

This makes the work done in anaerobic chambers to be a careful one. You need to have prior knowledge and skills before handling such anaerobic chambers.

As per the time taken, the experiments performed in aerobic chambers occupy less time than the anaerobic ones and make use of more effort and energy. You always have to keep in mind that the samples must not come in contact with an oxygenated environment. This is also one of the reasons why a lot of time is occupied.

Here is what you should know about anaerobic chambers prior to working with them:

  • Anaerobic chambers resemble big boxes of gloves. These could be either in sets of one or two depending on the number of times to be used.
  • If not like boxes, the anaerobic chambers resemble bags of polyvinyl that are flexible.
  • For the purpose of eradicating oxygen from the chamber always keep a catalyst of palladium in the chamber.
  • There is the presence of a transfer chamber that is airlock so that the chamber’s environment inside does not change due to bringing external substances inside it.
  • A mixture of 95% of Nitrogen along with 5% of Hydrogen is present in the chamber.

All you need to know about Anaerobic Chambers

Things to remember prior to working in the transfer chamber:

  • Degas all the samples from any oxygen. You can do this by bringing the items in the transfer chamber.
  • Keep a track of all the necessary materials that are required for the experiment. This avoids any contamination in the room and lowers the number of times you will have to go in and out of the chamber. Therefore keeping the gas safe from getting wasted.
  • All the necessary samples and other equipment for the experiment are supposed to be brought a night earlier in the chamber.
  • Renew the catalyst used in case the detector for oxygen detects it and goes off.
  • Argon/Nitrogen gas is an inert gas is capable of purging the solutions. Do it 30 to 60 minutes before taking the samples into the intake chamber. Purge or degas buffers/solutions for 30 minutes to an hour with an inert gas such as argon or nitrogen before you bring them into the intake chamber.
  • In the presence of the reductant, you are free to let the protein that is stable and requires disulfide reduction do the process of incubation without oxygen. Once the incubation process is done, inside the chamber you can do the overnight dialysis of the reductant.
  • If you find that there is not enough stability of the protein for dialysis then you can use inert gases to degas it. Before the process of disulfide reduction follow it by equilibrating inside the chamber.

All you need to know about Anaerobic Chambers

Remember these inside the anaerobic chamber:

  • Avoid bringing ice cubes inside as it leads to the presence of some amount of oxygen in the chamber. A Styrofoam box can be used instead by storing ice packs in it. Storing of samples can also be done by using nitrogen in liquid form, this freezes the samples. However, you need to take care of this:
  • There is a possibility of the pressure inside the chamber to increase as the liquid nitrogen is capable of releasing nitrogen gas and filling up the chamber. It is advisable to vacuum out half the gas in the liquid nitrogen. Be careful.
  • Do not leave behind any trash.
  • Items such as beakers, tips for pipets in all sizes, tabletop centrifuges, all kinds of tubes (microcentrifuge, conical), etc. should be stocked up in the chamber so that the next experimenter can make use of it.

Conclusion:

Not every chamber for the experiment is anaerobic. Other chambers can be found around the lab. However all of them are not anaerobic. The following should not be confused with anaerobic chambers: glove boxes of oxygen animal study and tissue culture, dry boxes, and full control of humidity.

If you’ve never come across Anaerobic Workstations, they can be quite daunting. Performing experiments involving gases, seals, redox states, vacuums, regulators, and precipitating or evaporating proteins can be difficult.  However, the anaerobic chambers can last for a long time efficiently and produce some interesting research if they are well-maintained.

Posted on

The Importance of Anti-Slip Pendulum Feet

It is of course true that there are a few things in life more important that the anti-slip feet on the bottom of a Pendulum.  You could even argue that there are many things of higher priority than the components of a BS 7976-2 Pendulum.  What should be of the utmost importance to any Pendulum operator however, is the integrity of the testing process and the accuracy of data produced, and the performance of anti-slip feet is supremely important in ensuring this.  This is why Munro Instruments are now offering upgraded Pendulum feet.

Practical Considerations

The basic principle of a Pendulum test is just that, a weighted pendulum.  The pendulum swings from a point of release, striking the floor and reading the slip resistance of that floor on the overswing.  If the pendulum doesn’t come in to contact with the floor then it swings freely to give a 0PTV result.

The pendulum Tester must swing freely in an arc about a fixed point.  Whilst the Pendulum frame is sturdy, it wouldn’t be practical to physically fix the machine to the floor, so movement of the frame across the floor has the potential to alter results produced.  This is of such importance that measures to increase stability of the frame were introduced by the UK Slip Resistance Group, namely a weighted back foot and anti-slip feet.

The anti-slip feet are a crucial part of a robust testing system.  With a weighted back foot and anti-slip feet, the frame is held securely in position, preventing movement and associated variability in results.

The Importance of Anti-Slip Pendulum Feet

UK Legal & Regulatory Requirements

Regardless of the practical benefits of testing with anti-slip feet, the feet are an essential component of a regulator-preferred and UKSRG-defined test process.  In short, if you fail to use anti-slip feet, you have not complied with the requirements of testing as directed by the HSE.

With slip resistance testing being so closely associated with slip and fall legal claims, it is essential that testing is conducted in accordance with industry best practice.  If your Pendulum doesn’t feature anti-slip pads for the feet, you cannot claim to have tested to the UK-preferred standard.   If you haven’t done the test correctly, you shouldn’t expect the results to hold any water in court.

Company No: 6965050  Registered Office:  44-45 Burnt Mill, Elizabeth Way, Harlow, Essex  CM20 2HU

If you are conducting tests outside the UK, I would strongly advise that you check your local standards/requirements as it is likely anti-slip feet have been incorporated as part of the test method given their previously discussed positive impact on accuracy.

The Munro Instruments Anti-slip Feet

The improved feet replace the existing levelling screws in the Pendulum frame.  Rather than the pointed tip which previously required an anti-slip pad to sit in, the new screws feature a sturdy plate with a rubberised bottom, essentially incorporating a small anti-slip pad in to the feet themselves.

Unlike other designs there is no movement between pad and foot which could lead to movement of the frame.  The rotational fixed pivot of the Munro design rotates with adjustment of the feet, but is otherwise solid and stable, maximising accuracy and repeatability.

The new feet are backwards compatible with all Munro Pendulums, and it is simply a case of swapping out your older levelling screws with the new ones provided.  A 5 minute job with a significant impact on both the accuracy and validity of results produced by your machine.

Having been subject to extensive testing in the field, the feet have proven to remain effective on a wide range of materials and in a wide range of conditions, and remain effective even on difficult surfaces such as slopes, stairs and aggressive profiles.

Benefits to Pendulum Operators

If, like me, you have been using a workable but ‘DIY’ pad system, it is well worth an upgrade.  Whilst my experience as a Pendulum operator is unusual, I conduct testing daily on sites across the UK, one benefit of the improved Munro anti-slip feet was immediately apparent to me.  With the feet attached to the Pendulum frame, I didn’t have to remove and set up the pads 36 times for every test, a blessing both for my aging frame and the efficiency of testing.

Further benefits of the new anti-slip feet include the protection of easily damaged surfaces from the harsh points of the old feet, and the knowledge that the essential pads weren’t going to be forgotten or misplaced during a test remit.

Crucially, the improved factory-fit feet provide excellent performance, and look as if they belong.  Aesthetics shouldn’t matter in testing, but any observer is likely to be given a greater sense of confidence in the results with a setup that both looks and performs professionally.

Order your anti-slip feet today – www.munro-instruments.com